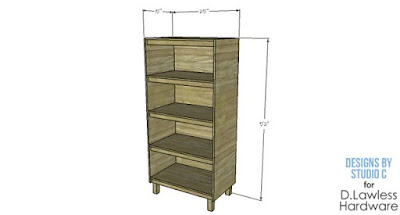
This easy to build bookcase uses 2’ x 4’ sheets of medium
density fiberboard (MDF), an inexpensive alternative to plywood, and has
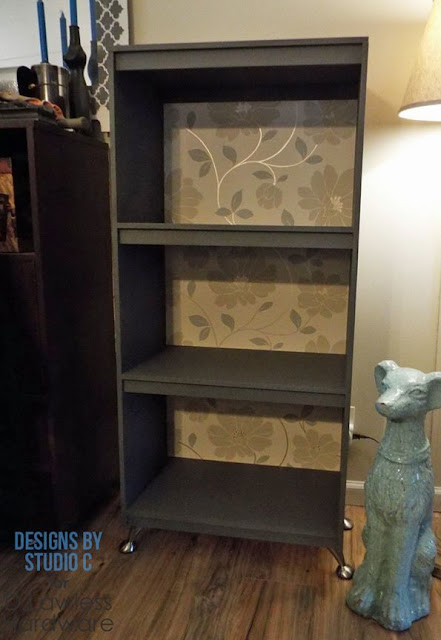
fabulous, sleek metal legs. The back of the bookcase in the example was covered
with a coordinating wallpaper for a pop of color!
And the finished product...
Materials:
·
1-1/2” brad nails
·
Wood Glue
·
Paint of your choice
·
Wallpaper and glue or Mod Podge, optional
Tools Needed:
·
Table saw or Circular saw
·
Pneumatic brad nailer with compressor
·
Drill with a Phillips bit
Lumber:
·
4 – 2’ x 4’ sheets of ½” MDF (or 1 – 4’ x 8’
sheet cut into fourths)
·
1 – 2’ x 4’ sheet of ¼” plywood
Cut List:
·
2 – ½” MDF at 15” x 48” - Sides
·
8 – ½” MDF at 1-1/2” x 23-1/2” – Front &
Back Stretchers
·
4 – ½” MDF at 15” x 24” – Shelves, Top &
Bottom
·
1 – ¼” plywood at 24” x 47-1/2” – Back
Step One
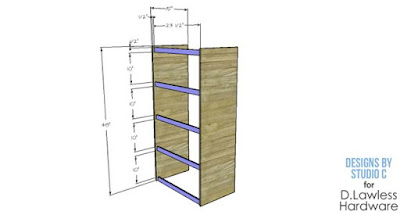
Cut the pieces for the sides, and the front and back
stretchers. Secure the stretchers using glue and 1-1/2” brad nails as shown in
the drawing, locating them ½” back from the front and back edges of the sides.
The top stretchers will also be located ½” down from the top of the sides.
Step Two
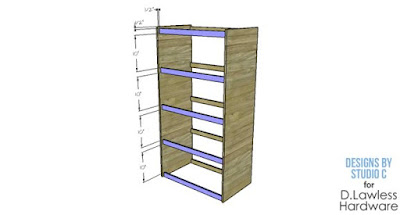
Cut the pieces for the shelves, top and bottom. Position
these pieces on top of the stretchers securing in place with glue and 1-1/2”
brad nails.
Step Three
Cut the piece for the back. If using wallpaper to cover the
inside of the back, apply a coat of glue or Mod Podge to one side of the back
piece, then smooth the wallpaper in place. Trim away any excess.
Secure the back in place using glue and 1-1/2” brad nails
through the back into the sides, shelves, top and bottom.
Step Four
Finish as desired. I used a few coats of a charcoal grey
chalk paint on the example, then used a clear wax over the paint.
Secure a 2x4 block in each corner of the bottom under the
lower shelf using glue and 1-1/2” brad nails through the top of the shelf.
Position the legs on the blocks, then secure the legs using 1” screws.


1 comment:
great job!
Post a Comment